
If you've ever wondered how to fake tilt shift timelapse footage then this blog is for you.
On the weekend I was invited to shoot the city of London’s 50th pride parade.
Over one and a half million people attended, with 30000 people walking in the actual parade.
It was a spectacle of colour and love and we got by far the best view in town!
Because of our unique point of view I decided to do something I hadn’t done in a while and edit my footage to look like a tilt shift or miniature timelapse.
Here’s my fake tilt shift tutorial, which features the short video I made for my instagram.
According to Wikipedia the definition of tilt shift photography is this: the use of camera movements that change the orientation and/or position of the lens with respect to the film or image sensor on cameras.
In layman's terms: using a lens that you can tilt and or shift in front of your sensor.
Tilt shift photography is most often used in architectural photography to keep straight buildings looking straight when looking up or down with a wide angle lens.
Because of how these lenses work, they can give you ‘weird looking' out of focus areas in your photos and videos.
When used in video or timelapse, you can trigger your brain to believe that what it's looking at is actually a miniature scene.
This is because of how our brain interprets the in and out of focus areas.
You can try this for yourself: If you bring your face really close to a small object, everything that is not this object will be way out of focus.
Because tilt shift lenses are very expensive and I don't own any myself we're going to emulate this effect with some digital trickery. (check out the legendary Canon 17mm Tilt Shift lens here)
Tilt shift photography is technique that has been used and shared for years and years in the timelapse scene. Some of my favourites short films have been done by Keith Loutit who is an absolute master. Check out one of his iconic pieces below, created over 9 years ago!
Anyways, back to the parade. I only brought a basic photo kit with me because I didn’t know where I’d be going that day and I wanted to keep everything light weight.
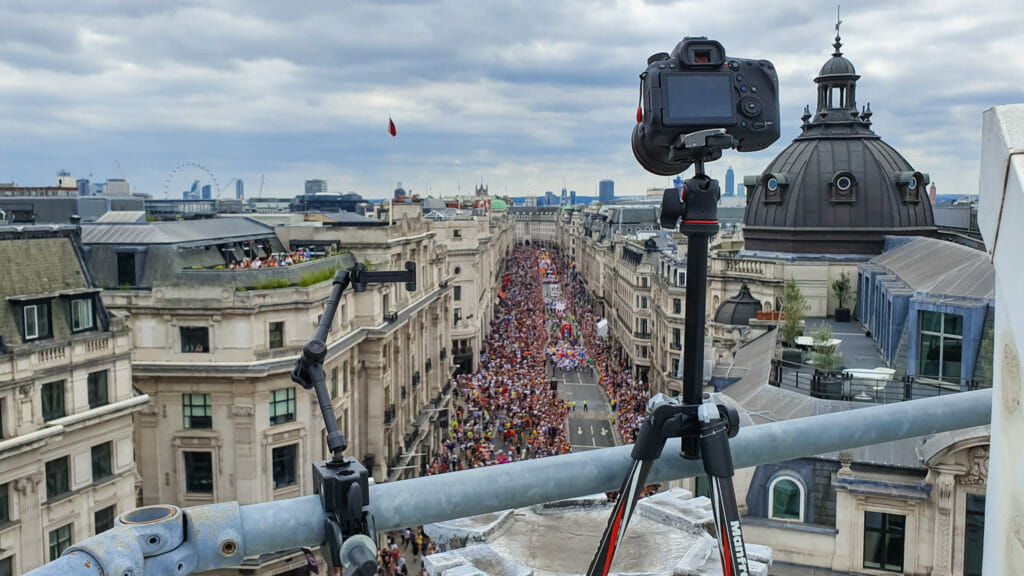
Fake tilt shift gear
- A small tripod, the Manfrotto Carbon Fibre Befree)
- My trusty DSLR, a Canon 6DMkII
- My favourite lens, the Canon 24-70 for both a wide angle and a tele shot.
- I shot everything as 4K timelapse movies internally to reduce post production time.
- I made sure to shoot a bunch of angles to have enough footage for the edit.
If you'd like to see all of the gear I use for my commercial timelapse productions, check out this page here.
What do you need for fake tilt shift footage
- A fast shooting interval (ideally more than 1 photo per second)
- An elevated point of view. This helps with the illusion of looking down at a miniature scene.
- A scene with movement. A parade is ideal as it has people, floats, trucks etc.
How to edit timelapse footage to look like it's miniature
Here's the post production technique in short:
- We’re going to slow down the movement so it looks slightly choppy.
- Then we’re going to add fake lens blur by adding a blur filter and using masks to keep certain areas in focus.
- Then we’re going to add contrast and saturation.
Have a look at this page here to see what other timelapse software I use.
Fake tilt shift timelapse workflow
- I imported my footage into FCPX (this is the same process in PP, FCP just runs better on my laptop).
- Slow the speed down to 50 or 40 percent.
- Add a gaussian blur filter, then add a mask to that filter. The mask will be used to keep certain areas of the frame in focus.
- The areas in focus will be along the z-axis (the depth axis), so keep an eye out for buildings that should be out of focus on the sides of the frame.
- It doesn’t make sense to just have a strip of your frame be in focus, certain buildings might actually be closer or further away.
- Analyse the frame and use multiple masks to add/remove the gaussian blur wherever it makes sense (according to how far removed from the camera they are).
- Edit the gaussian blur parameters to look more like a natural lens blur.
In this shot you can see that I had to add quite a few masks for the buildings etc (the red lines are the outlines of the masks).

The following shot was very straightforward as you can see, a single mask was used to blur the central part of the image.

Once you’re happy with the blurring, add some contrast and saturation to the scene.
The added contrast and saturation increases the impression that it looks like a miniature toy scene.
Finally you need to find music for the scene, something playful. I almost always use Epidemic Sound for my youtube videos.
Sign up at the following link for free and get a month's worth of free music and sound effects. You can cancel at anytime. If you sign up to this link I make a few dollars and you help me make more free tutorials, it's a win win!
Click here for free music and sound effects.
If you want to master timelapse photography in no time and add a very valuable skillset to your repertoire while supporting an independent creator like myself, hit the link below.
Here are some more free timelapse tutorials:
How to shoot through a window without reflections.
How to combine slow motion and timelapse footage in one shot.
How to shoot a sunset or sunrise timelapse without flickering.


